
Scones are the perfect pastry option for breakfast or tea parties. Slightly sweet, a perfect Scone is usually moist and soft on the inside, crumbly and crispy on the edges, buttery and flaky.
What Are Irish Scones?
In its most basic form, a scone is a baked quick bread that is usually eaten for breakfast or tea. Since its earliest known origin, the scone has taken on many forms, all the way to what we know today in sweet and savory versions.
The word “scone” originated from the Scottish word “skonn” which means “to cut, slice, or break off.” That makes sense. Traditional scones are bread-like biscuits that could be broken off of a larger dough.
The earliest scones were unleavened and typically made with oats and milk. They were often cooked on a griddle and served with butter, jam, honey, or clotted cream.
Irish scones are pretty similar to English scones in the sense that they use the same ingredients, flour, butter, sugar, salt, baking powder and buttermilk. The difference is that they are not as sweet and typically dried currants or raisins are added to them.
They aren’t as sweet or rich as American scones because they don’t contain as much butter or sugar. They’re intended to be plain, simple, and only moderately dense so that they can be enjoyed with butter, jam, or cream.
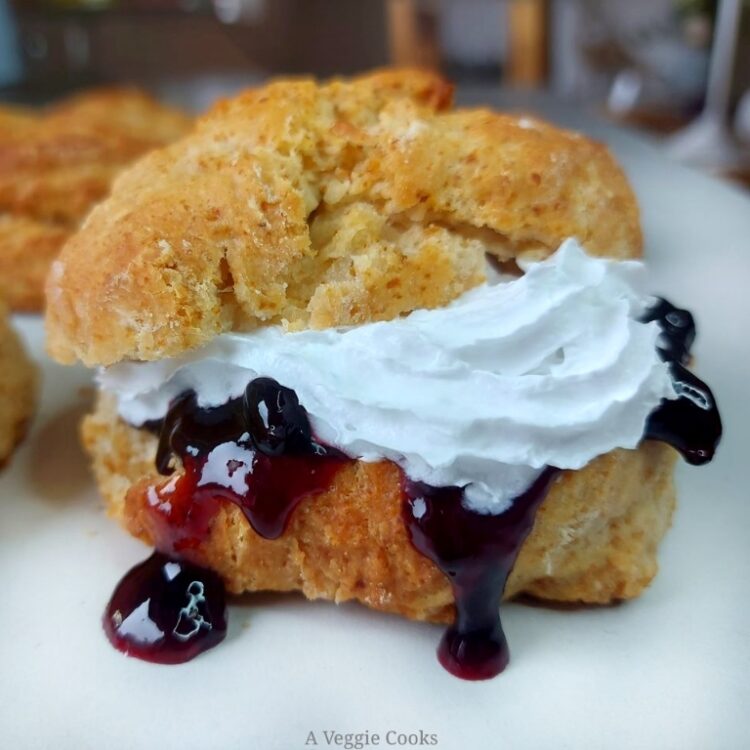
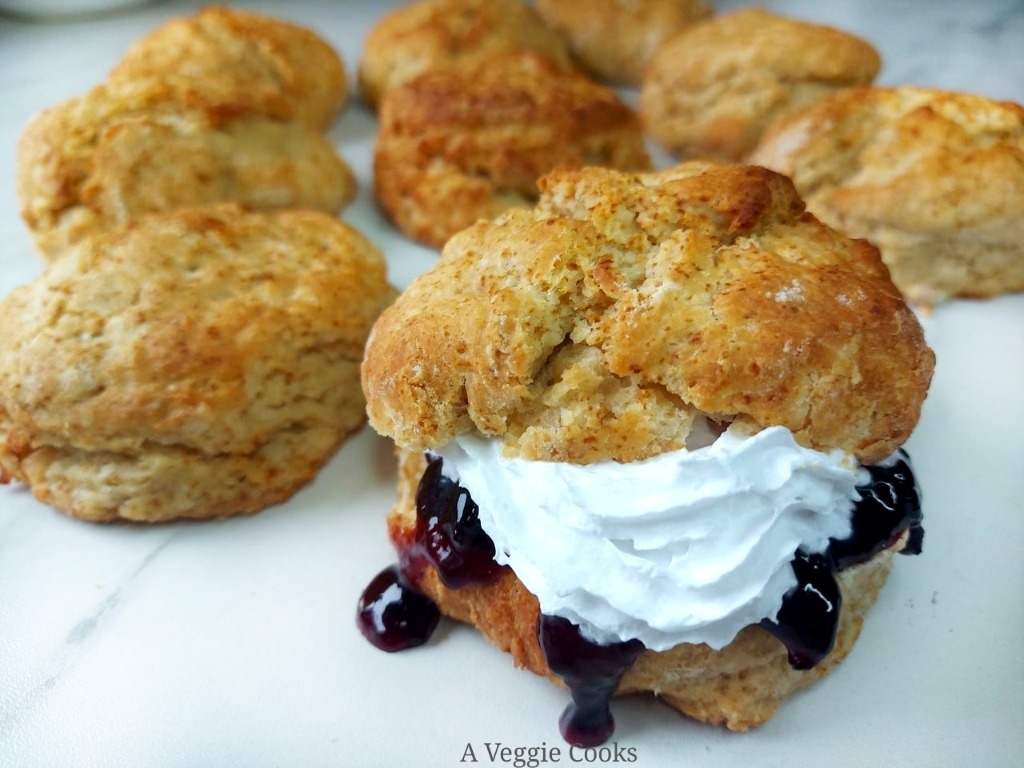
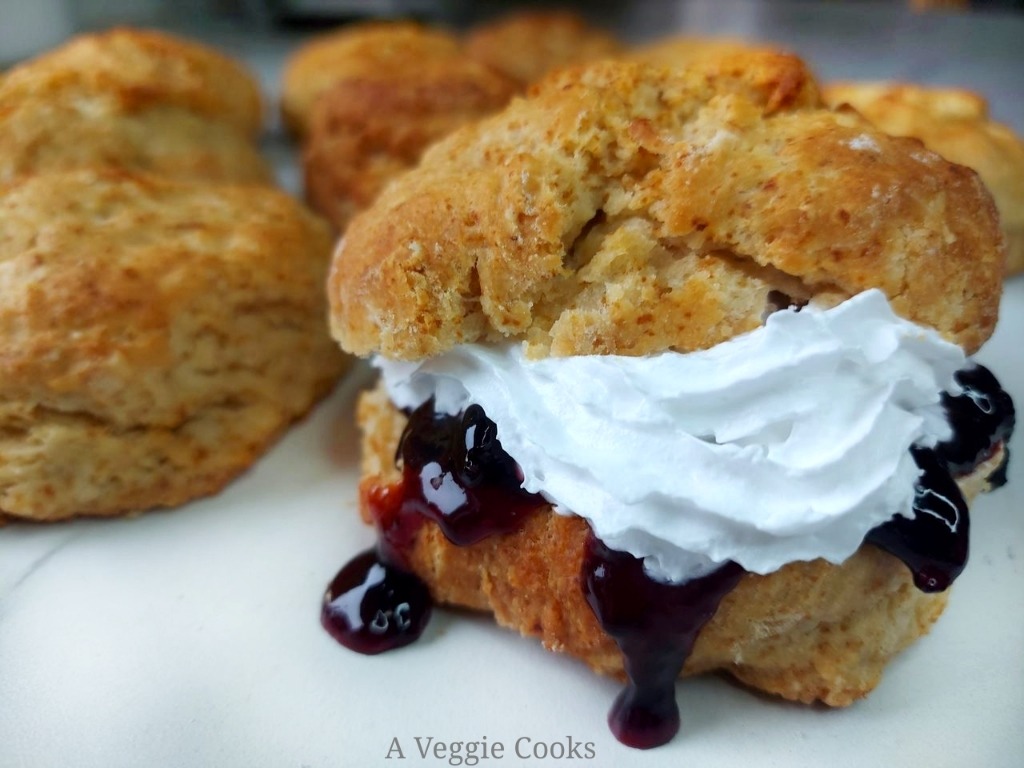
In Ireland, we usually serve Scones with butter, jam, and whipped cream. And as a must, they taste better when served warm and fresh.
Ingredient Notes
- Vegan buttermilk– Irish scones are usuallymade with buttermilk which makes scones fluffy and tender. It’s a simple to make vegan buttermilk with a mixture of dairy free milk and apple cider vinegar or lemon juice.
- Vegan Butter – This recipe calls for block vegan butter, not spreadable margarine from a tub.
- Plain White Flour – A lot of recipes for scones will call for self-raising flour, but I usually use plain white flour.
- Baking Powder – Make sure your baking powder is fresh. You can check the freshness of your baking powder with a very simple test: Mix one cup of hot water with 2 teaspoons of baking powder. If there’s an immediate fizzing reaction that dissipates all of the powder, you’ll know it still works. If there’s no bubbling, the baking powder is no longer potent and needs to be replaced.
- Caster Sugar – there is only a small amount of sugar as Irish scones are traditionally only slightly sweet.

Have you made scones before but they were hard and heavy?
Scones should be light and soft. If yours are not then follow my tips to success so you never have tough scones again. A few simple steps will make all the difference in your results.
How to make the perfect scones and the common mistakes to avoid:
● Make sure you sieve the flour and baking powder into your bowl. This means that the two will be well mixed together, which gives you a better chance of an even rise.
● Unlike most other baking, when it comes to making scones, cold butter is best and will lead to a perfect rise. Keep the butter in the fridge right until you need it
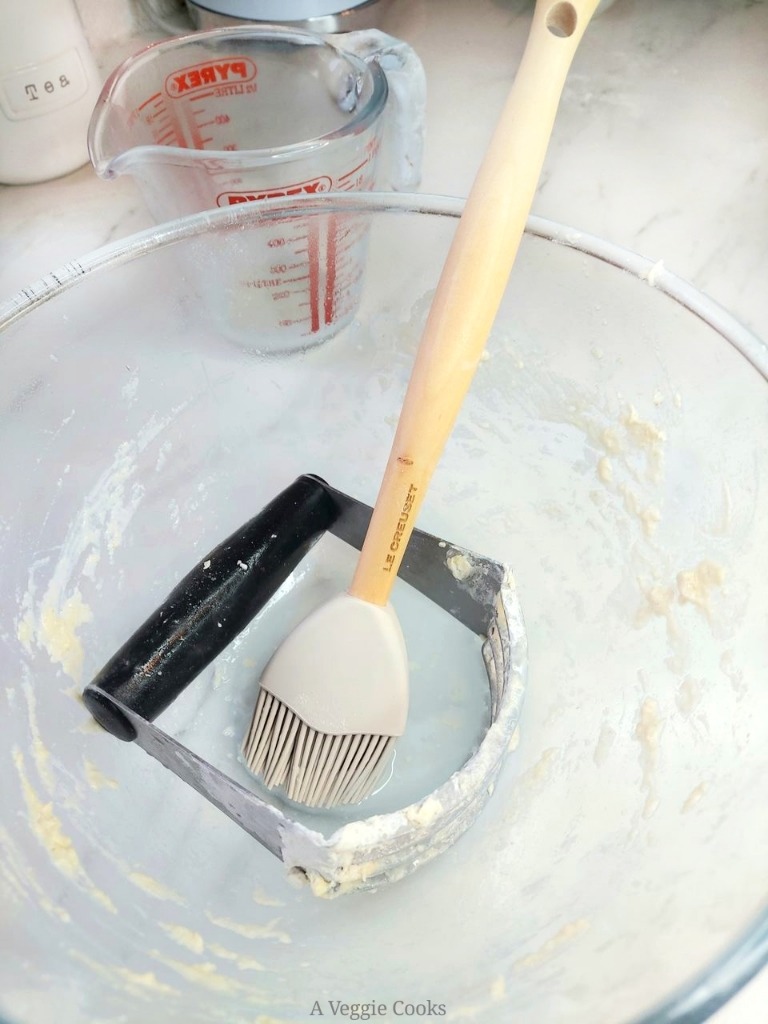
● Afflicted with warm hands? Consider using a pastry cutter to do the work for you.The dry ingredients can also be mixed together in the food processor and then you can add the butter and pulse just until you have coarse crumbs.
● Always have your butter cold and cut it into small cubes as this makes it much easier to blend it into the flour.
● Mix the milk in by hand. Pour into hole in centre of flour and make circles with your hand until liquid just absorbed.
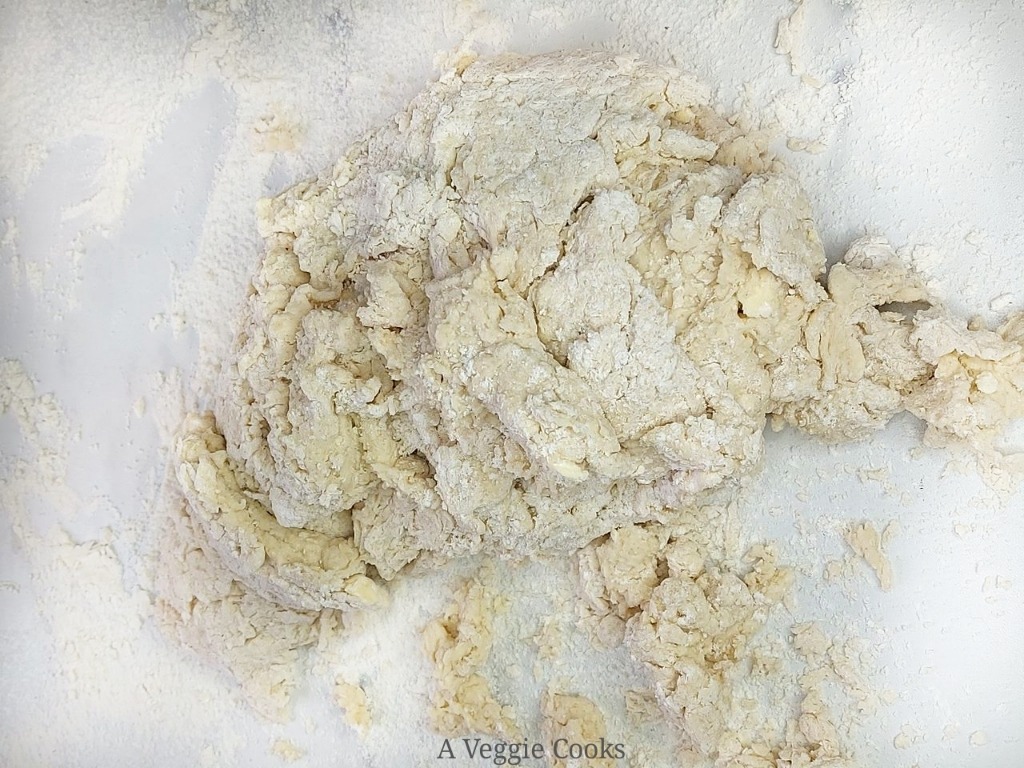
● Turn the dough out onto a lightly floured surface and use a pastry scraper to bring the dough together into a rectangle. Fold the dough over itself 3 times to create flaky layers.
● Don’t add too much flour to the surface when you roll out your dough. It’s easy to forget that flour on your work surface still adds to the dough, which can make the scones heavier.
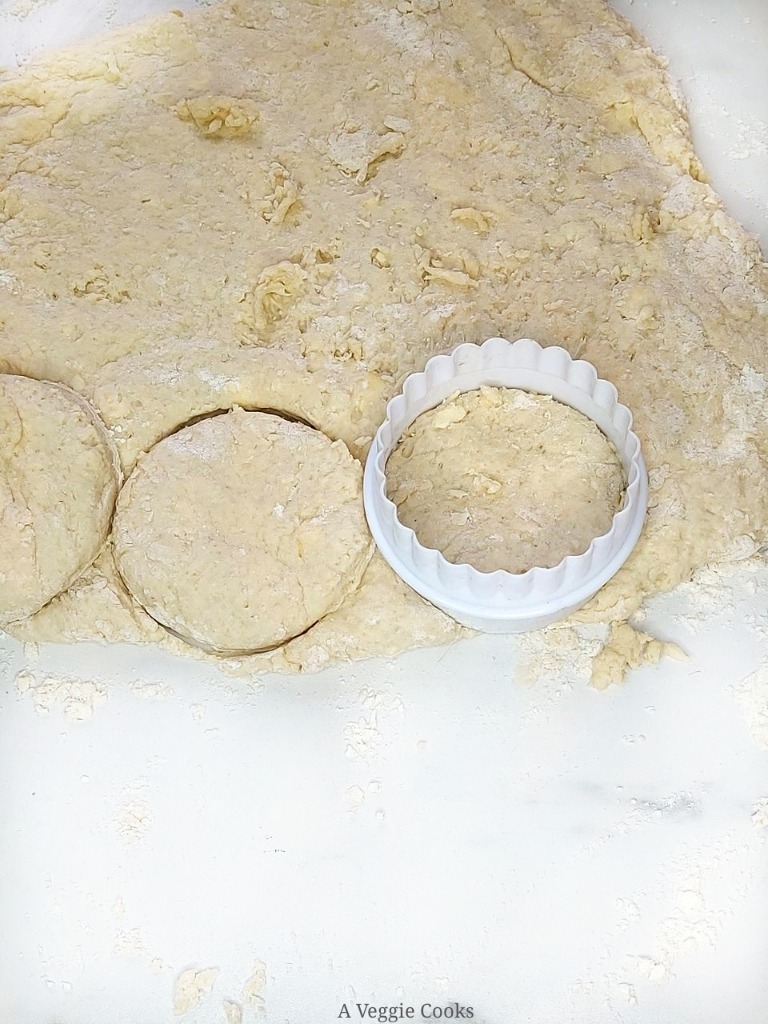
● Don’t twist the cookie cutter. Make sure you dust the cutter with flour before pressing it down into the dough, then carefully lift it back up without twisting it.
● Much like cinnamon rolls, arranging your scones side by side, just touching one another, helps in making the scones rise evenly, and higher. Heat causes the scones to rise so if they are placed side by side, the scones will be forced to rise upwards, not outwards. Thus, scones arranged closer would rise higher than those baked apart.
● Brush only the tops of the scones with milk wash before baking. You just want to glaze the tops so that they crust and caramelize while leaving the sides bare so that the scones rise properly.
Scone mixture may be weighed up ahead – even the day before. Butter may be rubbed in but do not add raising agent and liquid until just before baking.
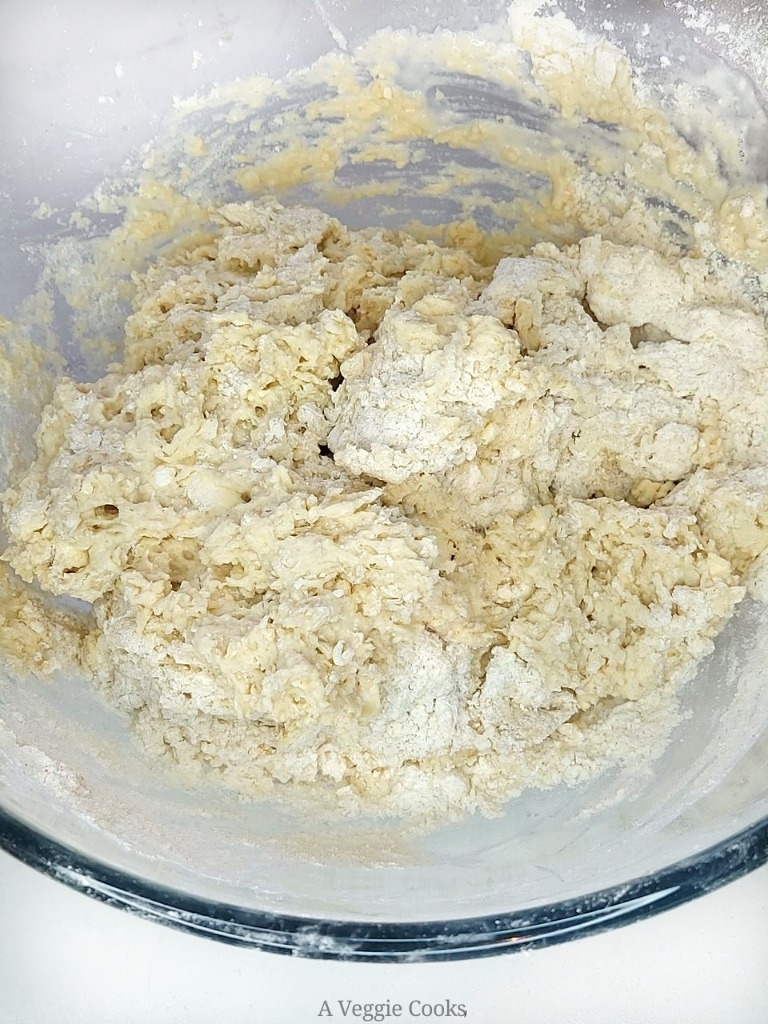
Combine the dry ingredients and the butter in a large mixing bowl and using your fingertips, rub in the butter until the mixture resembles rough breadcrumbs.
Making a well in the mix, pour the liquid into the crumb mixture and mix through with a two forks until a rough dough forms.
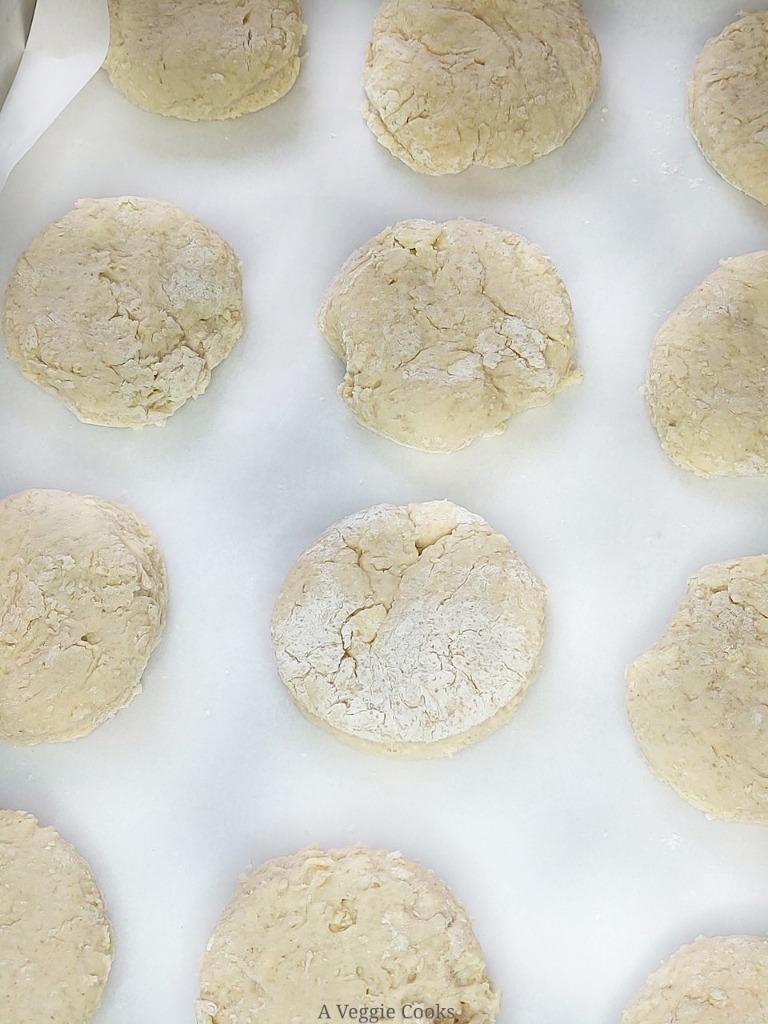
Dust a clean work surface with a little flour, turn the dough out of the bowl and press into a round shape. With a rolling pin, roll the dough out to a thickness of about 4cm (1.5″). Using a 7.5cm (3″) circular pastry cutter, cut out the scones and place on the baking sheet. Press the trimmings together, roll out and repeat until you have used all the dough. Otherwise just cut into squares. Dip the cutter into flour here to prevent sticking.
Brush with milk and sprinkle with sugar for a nice crunchy top if desired or the sugar can be omitted.
Put the scones in the oven and bake for 10 to 15 minutes until risen and golden.
As always, scones are at their best shortly after baking.
Vegan Irish Scones are delicious warm from the oven so be sure to have the kettle boiled to make a cup of tea to go with them!
Swaps and Substitutions
- Fruit Scones – Add up to 100g of dried sultanas or raisins to the dough. Stir these into the dry ingredients with the sugar before adding the wet ingredients.
- Cherry – Add 100g of glace cherries , washed and cut into halves. You could add a few drops of Almond Extract if you like too.
- Chocolate Chip Scones – Add 100g of vegan chocolate chips along with the sugar before adding in the wet ingredients.
How To Store and Freeze Scones
These Irish scones are best enjoyed fresh out of the oven, but you can also enjoy them warm or at room temperature.
Store leftovers in an airtight container on the counter for up to 3 days. Alternatively, freeze leftover baked scones, thaw on the counter overnight, and rewarm them in a 200°C/400°F oven.
If you’d like to make these scones ahead of time, you can also freeze them unbaked on the parchment-lined baking sheet. Transfer the scones to a zip-top freezer bag once frozen and bake them off directly from the freezer, as directed brushing them with the milk before baking. You’ll likely just need to tack a minute or two onto the baking time.
Did you make this recipe? Take a pic and share it on Instagram with the hashtag #aveggiecooks and tag @aveggiecooks__. I would love to see it!

Vegan Irish Scones
Equipment
- Baking Tin 35 x 23cm/14x 9 in.
Ingredients
- 450g /1lb Plain White Flour
- 3 Rounded Teaspoons Baking Powder
- Pinch Salt
- 25g /1oz Caster Sugar
- 85g /3oz Dairy Free Butter
- 300ml /10fl oz Dairy Free Milk
- 1 Tablespoon Apple Cider Vinegar or Lemon Juice
Instructions
- Preheat the oven to 220°C/430°/Gas Mark 5
- Add the Apple Cider Vinegar or Lemon Juice into the dairy free milk and let sit for 10 mins
- Sieve the flour, baking powder, and salt into a large bowl. Add the castor sugar.
- Cut the chilled butter into cubes and rub into the dry ingredients.
- Add the milk and bring the ingredients together into a soft dough.
- Turn the dough out onto a lightly floured surface and fold the dough over itself 3 times to create flaky layers.
- Roll the dough out to a thickness of about 4cm (1.5"). Using a 7.5cm (3") circular pastry cutter, cut out the scones and place on the baking sheet.
- Lightly brush only the tops of the scones with dairy free milk.
- Bake in the center of the preheated oven for 14-15 minutes until risen and golden on top.
Other Recipes to try: